Steps:
- Navigate to Organisation setup > Settings
- Open ‘Shop Timetable Options’ on the right of the page
- Tick ‘Timetable active’
- Click ‘Save’
Note: With the Timetable view enabled, customers will be rerouted to a timetable when they click into any of your scheduled product (class/event) shop tiles. The timetable 'icon' in your shop banner simply serves as a quick access point and can be named whatever you like using the ‘Label’ field.
The timetable view won’t affect any ‘Product’ shop tiles, used for merchandise, subscriptions, and money products.
To help your customers to find the classes they are interested in, you have the option to add extra filters when the Timetable View is enabled. The following filters are available:
Include 'view all' option in menu to show sessions without set locations
Gives your customers the option to view all scheduled sessions in one click from the Timetable icon
Show location in menu and filters
Allows your customer to filter by location within the Timetable/specific shop tiles
Show coaches
Allows your customers to filter by assigned coaches
Include images when viewing all products
By default, when in 'view all' mode, product images will not be displayed. Selecting this option ensures product images are still shown when in this view.
Use shop tile colour when viewing all products
As above, with shop colours – more information below.
Assigning product colours
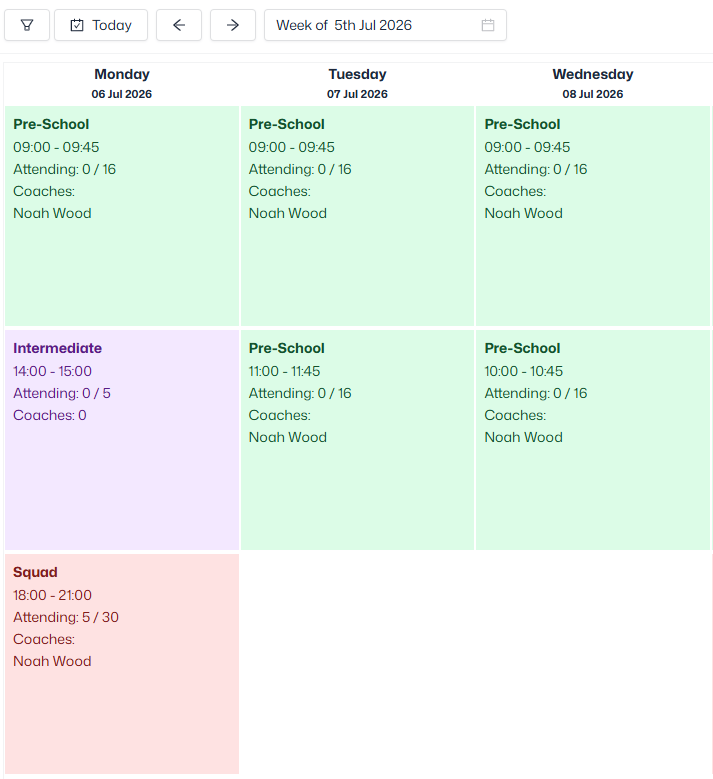
You can assign colours to specific products, which makes it easier for visitors to find specific sessions in your shop, and creates a more visually appealing display. These colours are also used within the timetable.
- Navigate to Product management > Products
- Select a product from the left sidebar
- Open ‘Details’ and select a colour
- Click ‘Save’
Product subtitles
When using the Timetable view, you can also add subtitles to your class/event products to highlight key details for customers browsing your shop. These allow you to display extra information that can be seen at a first glance, to help visitors easily locate the best sessions for them
- Navigate to Product management > products
- Select a product from the left sidebar
- Open ‘Details’ and enter the information in the ‘Shop timetable subtitle’ field
- Click ‘Save’