What is a field?
Fields are individual data entry points, essential for gathering information through a form. You’ll find a variety of field types to choose from, making it easy to tailor your form to your needs.
How to create fields:
- Navigate to Organisation setup > Data collection > Forms
- From here there are two options:
- Click ‘Manage fields’ in the bottom-right corner, then ‘Add field’ in the top-left
- Click ‘Add form, choose your form type, then add new fields (by type) in the left sidebar
Field types
Customer field
A customer-facing field, presented to customers in a form during the checkout process. Example: ‘Child’s school year’.
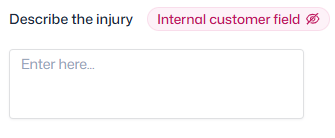
Internal customer field
An internal-only field to hold data against a contact, which can be updated by staff and coaches but cannot be seen by the contact. Example: ‘Safeguarding notes’.
Product field
A field attached to a product form, used to capture more data about your products. Example: ‘Stock code’.
Input options
There are 7 different types of input to choose depending on the type of data you are trying to collect, and how you want to collect it.
- Short text – for responses of one to a few words
- Long text – for longer text responses
- Number – for number-only responses
- Dropdown – single selection response from a dropdown
- Radio – multiple choice selection
- Checkbox – multiple choice selection
- Date – date-only responses
Note: The only difference between radio and checkbox is the shape of the checkboxes (Radio is circular).
Additional field settings
Each field must have a title, e.g. ‘Select your child’s school year’, and can optionally have additional text to include more information or assist customers.
You also have the choice of making the field required or not. If a field is required, it must be answered when filling out any form it’s in. If not, it can be skipped.
Once your fields are set up, you can begin creating forms. To read our help article on forms, click here.
Managing your fields
All your fields can be viewed and modified via the ‘Manage fields’ button in the bottom-right of the Forms page. Click the three dots on the right side of any field to access the following options:
Edit field
Quickly make changes to fields, such as updating the title. This will immediately update the field on all forms using it. If you only want a change to apply to a particular field, we’d advise creating a new field.
View history
View a log of all changes made to the field, and to which products it’s linked. This includes details of the user that made the change as well as the date and time.
Archive
At any time you can archive a field. Simply locate the field in the Manage fields page, click the three dots on the right, then ‘Archive’
This will remove the field from any forms or product it is attached to, but won’t fully delete it. The data (any answers) will still be accessible, and archived fields can be unarchived at any time.
To locate and restore archived fields, simply change the view type from ‘Active’ to ‘Archived’ in the top-right corner.
